Step 2 (continued)
Once you have the holes all ligned up on top, Ctrl-Click the "holes" layer to select all the holes. Press-and-hold Shift-Alt again and click-and-drag the selected holes down to create the holes on the bottom part of the film strip.
Step 3
Ctrl-Click the "holes" layer again to select all the holes, top and bottom. Click on the black rectangular layer in the layers palette to make that layer active. Then hit Backspace to knock out the holes out of the black rectangular frame. You can delete your holes layer—we no longer need it.
Now all you're left with is the black film strip frame (and the white background layer.)
Step 4
Add drop shadow to the filmstrip layer. If everything was done right, you will see shadows inside the holes too. This will give our final slide a three-dimensional depth.
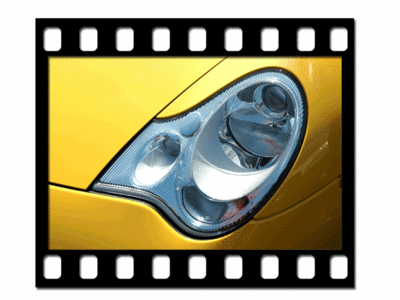
Open a photo of your choosing. With the Move tool active, click-and-drag the photo into your filmstrip document. Make sure the photo layer is behind the filmstrip layer. Ctrl-T or Edit>Free Transform the photo to fit just outside the white "opening". Kinda like this, or even tighter:
Step 5
Remember the selection we saved in step 1? Make sure the image layer is still active and load that selection now (Select>Load Selection). Everything outside that selection we do not need. So, invert that selection (Select>Inverse) and hit the Delete button. Now only what we need shows in the filmstrip frame.
Now you can connect all the layers in the palette and play with the entire slide. You can Free Transform the size and/or position of the slide.
Save the file with a .psd extention and you'll be able to drop a new image inside the slide frame on the fly.
Optional
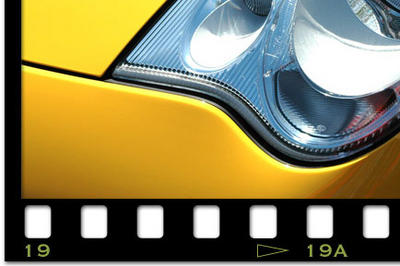
For even more realizm, add these markings on the bottom of the filmstrip. They indicate the slides' numbers.
Thursday, September 22, 2005
Film strip borders with Photoshop (Part 1 of 2)
Have you ever seen those cool looking borders that make photographs look like actual filmstrip or slides? Well, here's how to do it.
Note: You should know your way around Photoshop a little to follow these instructions.
Step 1
Create a new document. Make a new layer and draw a rectangular using a selection tool. Fill the rectangular with black. Draw a smaller rectangular inside the big one and hit Backspace button to cut it out of the black. Make sure that the white "opening" is close to 4 x 6 ratio, as that is the proportion of a real 35mm film.
You should have something like this:
Important: With the smaller rectangular selection still active, go to Select>Save Selection and save it as we will need it later.
Step 2
Create a new layer, name it "holes". With the Rounded Rectangle tool draw a rounded corner shape. You can control the roundness (radius) of the corner with the Radius field in the Options Bar (on top of the screen). Fill the shape with white and then delete the shape (let me know if there's another way to do it):
Ctrl-Click the "holes" layer on the layers palette to put a selection around our rounded rectangular shape. Press and hold Shift-Alt or Shift-Option on Mac and click-and-drag the shape to the right to duplicate (Alt makes a copy, Shift keeps it from going in a straight line). Repeat the step, until you fill the top strip with the white rectangulars. Kind of like this:
To be continued...
Saturday, September 17, 2005
I got accepted into Illinois Institute of Art!
Finally, I built up the courage to apply. I am officialy a student of the Illinois Institute of Art in Chicago. I'm crossing my fingers that it won't be just a fad.
The application process went relatively painless, not counting the $50 parking ticket. If everything goes as planned, I will have a BFA in Visual Communication by fall of 2007. Why so soon? Well, my 6 years of erratic schooling finally paid off (not really), and some of my credit hours will transfer. Instead of 4 years, I may finish sooner.
I don't know how prestigious the school actually is, but I don't care at this point. It's located in the heart of downtown Chicago, about 15 minutes from Metra station, so the commute won't be a killer (I hate traffic).
Subscribe to:
Posts (Atom)